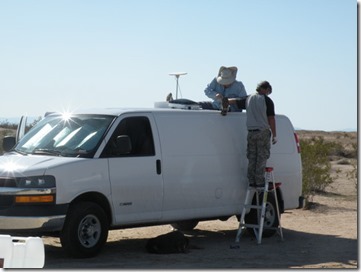
Bob Wells at the Slabs helping me to install my Fan -Tastic Vent Fan.($131 and up). (think Bob has a fascination for ladies on the roofs of vans – see his new blog post http://cheaprvlivingblog.com/2013/05/beat-the-heat-1-add-screens-2-paint-the-roof-of-your-van-3-buy-a-fan/)
I did all the work myself, but he was right there beside me the entire time. Others got frustrated by my learning curve... but I needed to do the work myself... so I can fix things it if I have too. With COPD issues, proper ventilation was my number one priority. Photo by Heidi Thomas (I think?) Had I enough money at the time, I would have gone with a little more expensive model, one with a remote control, as I sometimes forget to close the vent before I drive. Normally, it just kinda jiggles itself shut, and another thing, if it is opened until it presses against the platform, the wind can’t blow it anywhere, and the platform itself protects it somewhat. But there are times I wished I had a remote control to close it while I was driving, when I forget otherwise.
A friend commented that I'm the only person she knows who puts a hole in the roof of her van just to make a picture frame. Photo by Heidi Thomas. Note the ceiling is already insulated, and besides the cross supports, aluminum furring strips have been added which are thin and strong. The paneling is screw into the furring strips.
After I got the roof vent fan installed, I had this Kargo Master Pro II Van roof rack professionally installed and have been very pleased. It is heavy and it cost a lot (May 2013 price is $655), but now I have options for the roof once I build a wooden platform to go on the rack, I can attach many things, solar, TV antenna, haul stuff like kayak or other things, etc.. — in Monterey, CA. The rack on the above link shows the rear part of the rack bending downward… mine is straight… I wish it was bent like this… would make the kayak loading easier.


I had to change my kayak loading methods - began with a Honda Odyssey... and this Chevy is much much taller... but I have now perfected a new technique for this old 60-something lady loading the 12' plus kayak on top - alone without help. From the ground, I cannot even reach the kayak. Very doable, albeit tricky.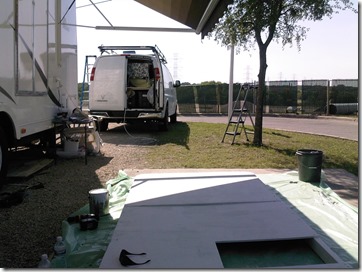
Went to TX to have friend/vandweller Ron McDowell help me with the design and construction of the roof rack platform. Purpose was five-fold: 1) shade the vehicle, 2) mount solar panel, 3) mount t.v. antenna, 4) carry kayak, 5) opening for vent fan cover. I built and painted the platform on the ground and then a couple construction workers came by and loaded it onto the rack.
I installed the solar panel in the dark using a small LED light. If I can do that, anyone can install these things. (it was too hot to work in the sunlight)
Next, I had to figure out how to attach it to the rack. Ron was great in providing me with shade and ideas. TX heat was terrible and most of the time I could only work 10 min, drink a bottle of water or pour one over me... a perpetual wet-shirt show. I'll never live in TX. — in San Antonio, TX.
RIP Ron McDowell, you are loved and missed.

The opening allows me to open the vent fan lid most of the way... one unexpected result of having the platform off a couple inches, was that the lid can press against the wood... and not flap in the wind. It is usually closed while I drive. I wanted the wood platform to have rigid support so I could walk or sleep on top. I painted it several coats to prevent weathering. I used 3/4” CDX plywood. (you can see Ron’s power chair on the right)

Another view of Ron's place, Ron under the awning, and the platform in progress. A good shot of the Kargo Master roof rack too.

The Fantastic Vent Fan was placed off-center to be near the head of my bed. I have liked this much more than it being centered in the van..
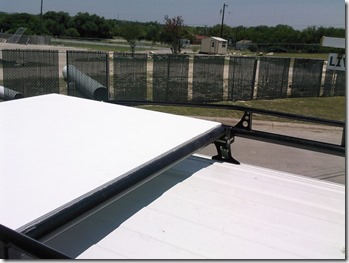
Checking to see the fit of the first section of wood. Also, lined up the seams of the plywood to rest on the cross bars of the rack, for more support. Marked the front corners to cut them curved to match the curve of the rack.

Left: Before the Platform was built. Right: With new platform.
The platform installed, vent open, kayak on top. About 5" of space allows plenty of room for air circulation. The roof is almost always in the shade now and you can’t imagine how much difference that makes to the inside temperature.. Keeps the van a lot cooler. It's 2:45 pm right now... I'm sitting in full sun and the inside temp of van is only 75 degrees.
The wire comes from the solar panel down through the wooden platform and into the roof to the solar controller. Have not had any leak in four years since I installed it. I first drilled a hole through the roof from the inside, so I could see where the hole should be cut from the roof. Then I used a hole-cutter bit on my regular drill, and drilled from the outside through the skin. I filed off the burrs and placed a rubber grommet around the metal edges. Then I used some of the vent fan caulking (Dicor Butly Tape) to seal up the wire/grommet/hole. You can see screws sticking through... don't have a tool to cut them off. Solar panel is held on with 8 screws. This probably should be changed to nuts and bolts, but it has not loosened at all in these four years.

The side 2x4 was laid down flat to allow more clearance for me to tie down the kayak. The bracket holding the platform to the rack is a pipe bracket (don't know the name) and it worked perfect, except I had to bend the ends. Holding tight after four years but the rubber padding has degraded and I have replaced some of it with pieces of yoga mat material.
This is the front edge of the rack (I had intended for the platform to line up with the rack, but that didn't happen). Doesn't really matter. Painted the edges of the platform black to blend in more with the cargo rack. Sometimes it's not noticeable that there is a platform on the rack.

I initially ran the t.v. antenna in the rear door but later ran it down the same hole as the solar cable. When I get a flat screen t.v. I may change this again and make a new hole in the rear left corner of the roof to shorten the length of the cable. I have also learned there is a flat cable made to go in doors like this, so I may get one of those. I may put in a splitter to see if it will also run a neighbor's t.v. as well and if we can watch different channels at the same time.

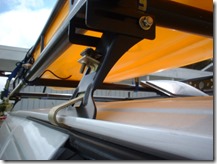
Close-up of the rear bracket.

So there it is... all loaded up. Only thing different is I carry the kayak in my trailer most of the time, to protect it from the sun, and I have built a ladder rack on the side of my trailer for the ladder, as it was always in my way. (Thank you Steven Ballee’ for your ideas and assistance on that one.).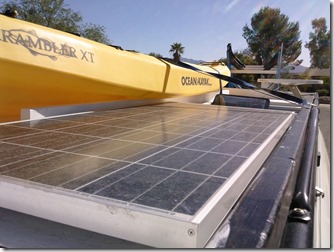
I can't think of much I would have done differently. Note the white 2” x 4” under the kayak - that is a guide that keeps the kayak lined up straight and prevents it from sliding toward the solar panel (135 watt). It was pure stroke of genius in the hot TX sun. Oh, and I have to be parked so the kayak does not shade the solar panel, another thing I had not thought out, but seems to be no problem.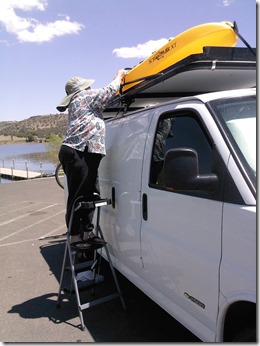
God, I'm glad I have lost weight since this was taken a few years ago (when I kayaked Arizona, my 4th state). Yuk. Anyway this is the tie down stage of loading the kayak. I keep this ladder in the side door of my van when I carry the kayak like this and am not towing the trailer.
Final thoughts: There are always tradeoffs. People think my set-up is too expensive, but I have constant shade on my roof, and I can climb up there and walk on it, sleep on it or sit and watch the stars. I can haul heavy loads on it if needed. I think it was worth every penny.
Water was gathering in the corners of the platform. I drilled a one-inch hole in each corner and then applied a few layers of caulk and paint. Now, if I am in rain, it drains right off and does not damage or warp the wood.


